Current Version 3.5.52 |
Compatibility Mode
In Windows 7 & 8 the Compatibility Mode for All RV Park applications (RV Park, MapMaker, ParkCalendar, and DataImporter) should be set for Windows XP Service Pack 3 compatibility. This is a very easy setting to make. Below, RV Park Compatibility Mode is set, but please remember to set the other applications as well.
NOTE: This should be done before using them. In the new Full Initial Setup program for RV Park, these setting are set for the Current User, but if you have other Users defined in your Windows 7 or 8 environments, the Compatibility Mode should be checked for them as well.
| For a Desktop Shortcut: | Click HERE for No Shortcuts |
1) Right-Click on the Application shortcut icon
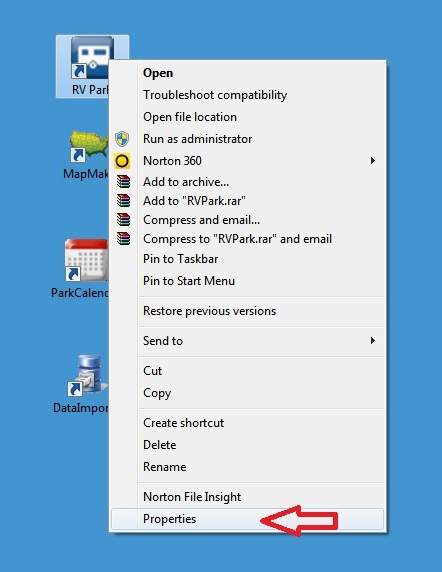
2) Select the Properties option at the bottom of the pop-up list as shown above by the red arrow.
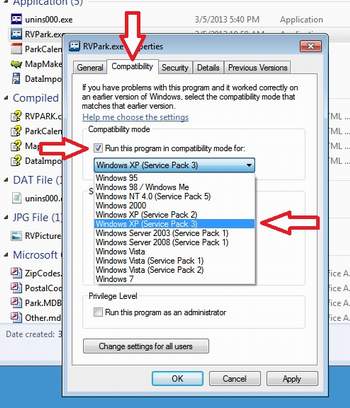
3) In the Properties panel, select the Compatibility Tab at the top of the panel shown below.
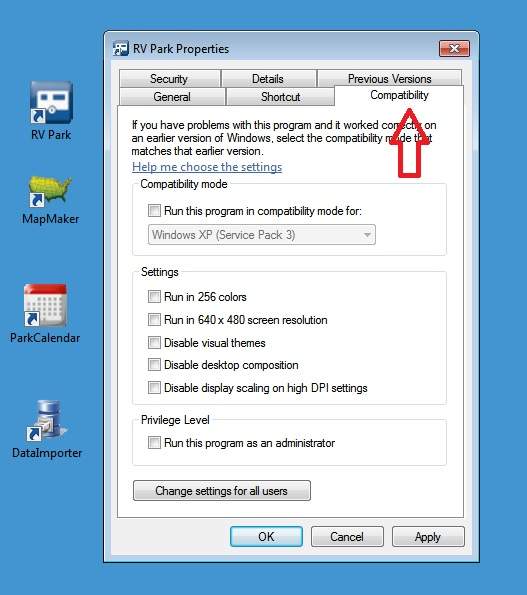
4) Now you can select the "Run this program in the compatibility mode for:" checkbox as shown below.
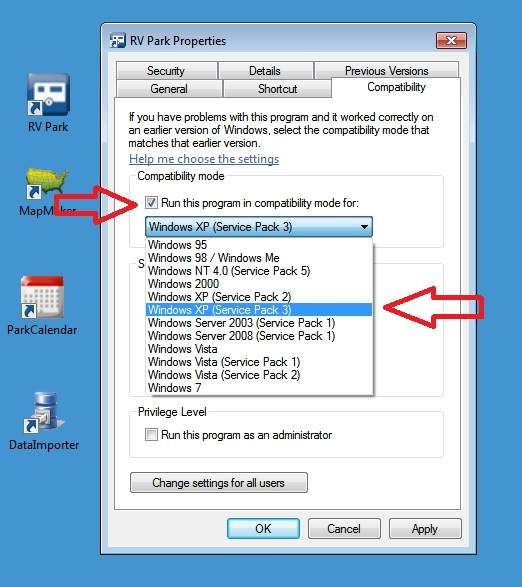
5) You need to use the Windows XP (Service Pack 3) option as shown above.
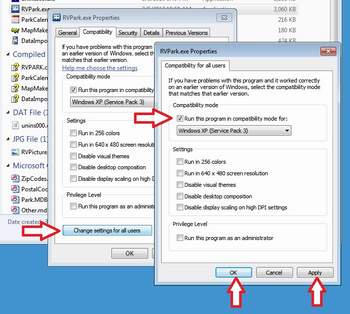
6) If you have other Users set up in your Windows 7 or 8 environment, you shoudl also Change the Settings for All Users option as shown below:
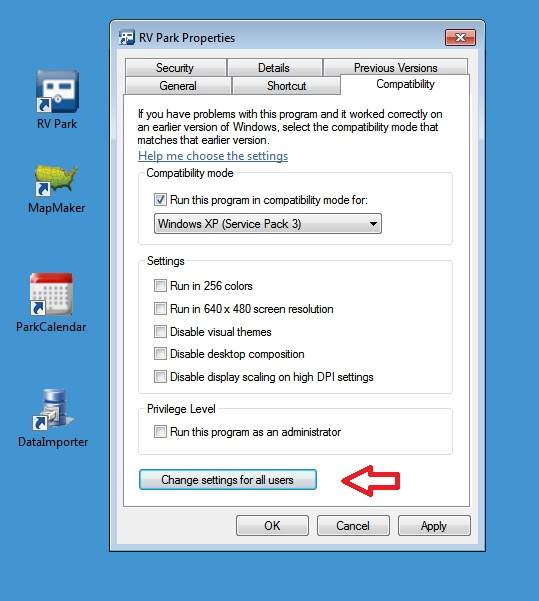
7) After pressing the Change settings for all users button, you can set the compatibility mode for all users as you did for the current user as shown below.
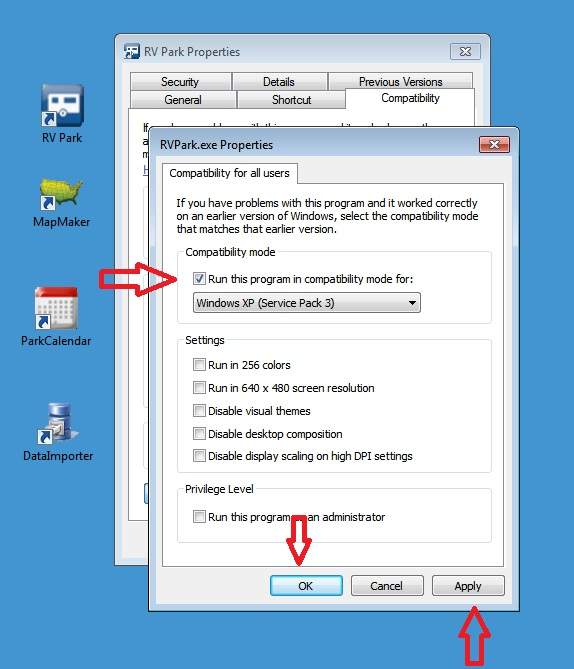
8) Then press the Apply button and then the OK button to close the panel.
9) Then the Apply and OK buttons for the Current User and RV Park is ready to use.
10) Remember to use the same process for the other programs, and you are finished.
If you do NOT have Desktop Shortcuts:
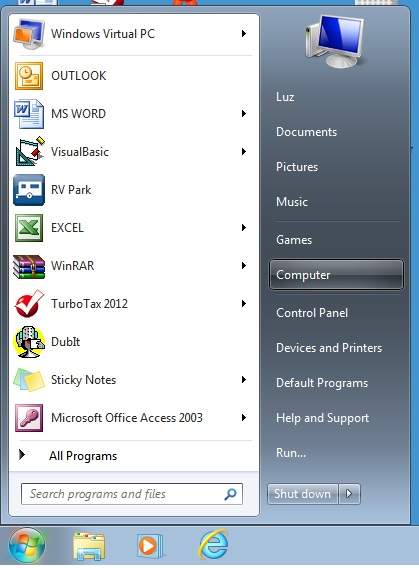
1) First, you need to launch the Windows 7 or 8 File Explorer to change the programs compatibility mode.
Windows 7 |
Windows 8 |
 |
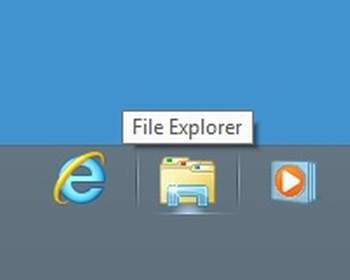 |
| 1) Select the Start Globe and sekect the Computer button on the Right side, or you can pick the File Explorer in the Taskbar. | 1) The File Explorer should be available in the lower Taskbar, click on the File Explorer. |
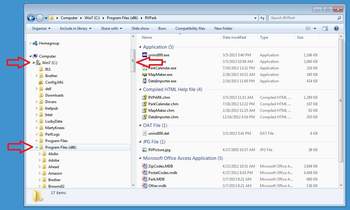
| 2) In the File Explorer, on the Left side of the panel, pick the small filled arrow next to your C drive. This will expand the C drive. Next, select the arrow next to the Program Files (x86) folder to expan it, using the slider seperating the folders & files, scroll down until you see the RVPark directory and select it. You should see the contents of the directory on the right side. See below: | |
 |
|
| 3) Right-Click the RVPark Application file and select the Properties option at the bottom of the Panel. See Below: | |
 |
|
| 4) Select the Compatibility Tab on the top of the Properties panel Select the "Run the program in compatibility mode for:" option, Select the Windows XP (Service Pack 3) mode. | |
 |
|
5) If you have other Users setup, you should set the application compatibility mode for All Users. Select the Change settings for all users button. In the next panel check the "Run the program in compatibility mode for:" option, Select the Windows XP (Service Pack 3) mode, press the Apply and OK buttons to set the option. Then press the Apply and OK buttons on the original panel, and the Application is properly set. |
|
 |
|
| 6) Remember to also set MapMaker, ParkCalendar, and DataImporter in the same manor. | |