Setting Up Your Park Maps
|
Setting Up Your Park Maps |
|


It is important that you first define all of your Sites in the RV Park Software before trying to create your Maps. This is because the application (called MapMaker) used to create your Maps uses those defined Sites to build your Maps, so if you don't first define them, they will not be there to use in MapMaker. The second key component needed to create a Map (OK, maybe it should be the first), is a computer based image of your Park. This can be a JPEG, GIF, or BMP type image. It needs to be in your RV Park Directory. When you have your Image(s) in the RV Park directory, and all of your sites defined in RV Park, you can begin creating you Map or Maps ... up to 4 of them.
First, you need to start MapMaker. This can be done from the MapMaker shortcut on your Desktop, or from a button on the RV Park Setup panel in the Other Tools area called Park Maps Tool.
Once in the MapMaker application you should see a panel similar to this, with a message that lets you know that Maps are disabled in RV Park, because the number of Maps required is set to 0.
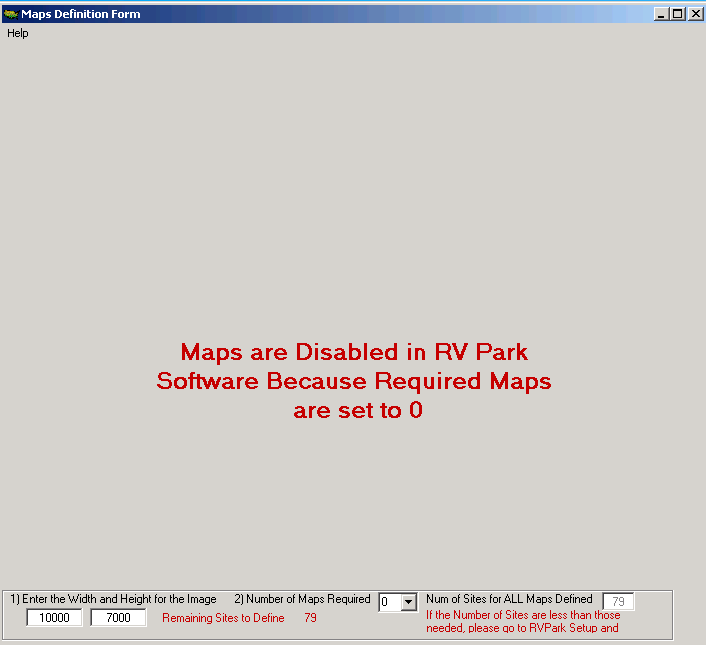
Looking at the bottom of the Panel, there are 2 areas to set, the first is the size of the panel. It is important to use the computer with the smallest screen to set these parameters. That is because if you are using more than one computer with RV Park, and you use your Larger screen to set these parameters, you may not be able to view sites positioned on the far right or bottom areas.
1) Enter a large number in the Width field like 999999 and press enter. MapMaker will stretch the Map screen as far as your screen will allow for it's width. Do the same thing in the Height field and it will be stretched as high as the screen will allow.
TIP: You can use smaller numbers
2) Now you need to determine how many Maps you need to best convey your Park. Most Parks need only one to show all sites, but you may have Boat Slips, Storage Sheds, RV Storage area, etc. that you want to separate from your regular Park??? For this example we will set the dropdown to 1, for only one Map.
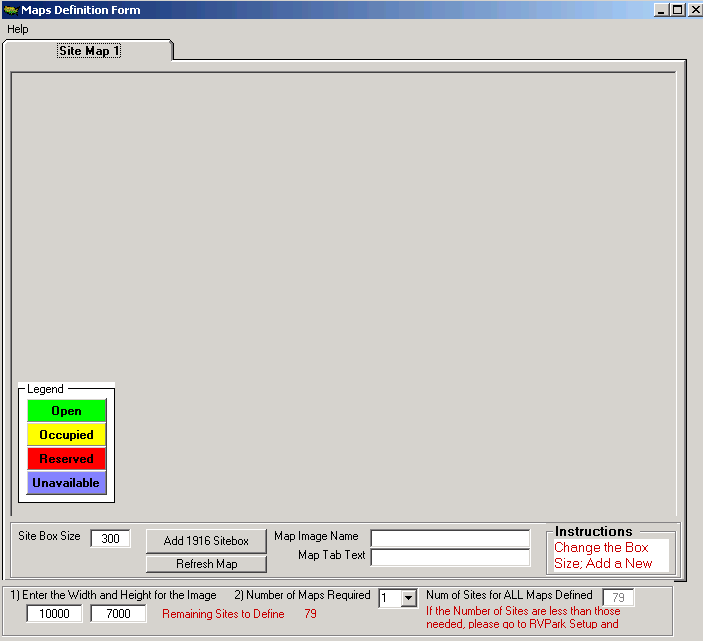
Once you set the dropdown to anything other than 0, you will see the Map Tab(s) and definition area:
Now, by double clicking on the Map Image Name field, you will get a list of all acceptable image files in the RV Park directory.
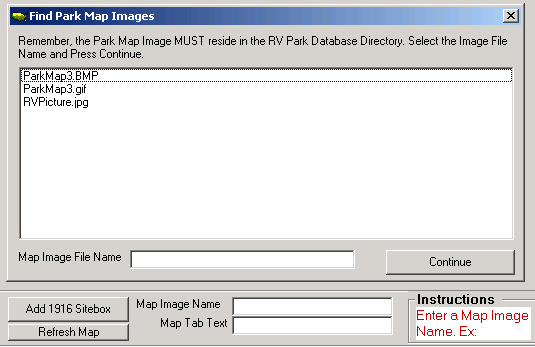
Left Click on the desired image for Map 1, press the Continue button and then use the "X" in the upper right corner of the Find Park Map Images panel to close it. Enter Text for the Map Tab Text field and you are done setting this Map. Example: Park Map
Your Map should be visible in your panel. If you have other Maps needed, go to each Tab and repeat the above steps to have all of the Maps you need defined. A Site can only exist on one Map, but you will need all of your maps defined to be able to place the Site Boxes on the appropriate Map.
The Last thing to do is to position all of the Site Boxes. Site Boxes can be as small as 200 pixels square. The "Default" is 300, but you can preset the Box Size to whatever is best for your Map.
At the bottom of the Tab you will see the Box Size field and an Add button. The Add button will let you know which Site Number (or Site Alias) will be created next. The next one in this example is 1916. So, with the Map Tab for Site 1916 selected, press the Add 1916 Sitebox button. A blue box will appear in the upper left of the Tab. This is Sitebox 1916. Simply left click on the box (holding down the left mouse button) and drag the Sitebox to approximately where it belongs on the Map and release the button. A Tweak PopUp will be displayed for you to better position the Sitebox. By just clicking the Arrows the Sitebox will slightly move to better reflect it's location.
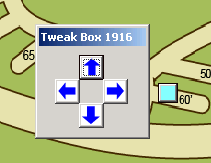
You can also use keys on the keyboard to adjust the location. U for up, D for down, R for right and L for left (lower case).
The Box can be resized after created, or deleted. Just select the box and enter a new size in the Box Size field (it's a little touchy, you may need to highlight the number you need to change and enter that number). You can also right click a SiteBox and it will ask if you want to Delete it.
For more information, please review the MapMaker Help files.

Created with the Personal Edition of HelpNDoc: News and information about help authoring tools and software